
Installing CalendarSMS should take no more than a few minutes. Simply follow the prompts:
Installing CalendarSMS
INSTALLATION STEP 1
Click here to download CalendarSMS.
INSTALLATION STEP 2
To Start, double-click CalendarSMS’ installer file, CalendarSMS.msi.
INSTALLATION STEP 3
The License Agreement page appears.

Carefully read the License Agreement. Click the checkbox if you accept the terms in the License Agreement.
[NOTE]
-
Administrative privileges are required in order to install CalendarSMS.
-
See “Advanced Installation” section below if you want to change the installation folder.
INSTALLATION STEP 4
Click “Install” to confirm installation.
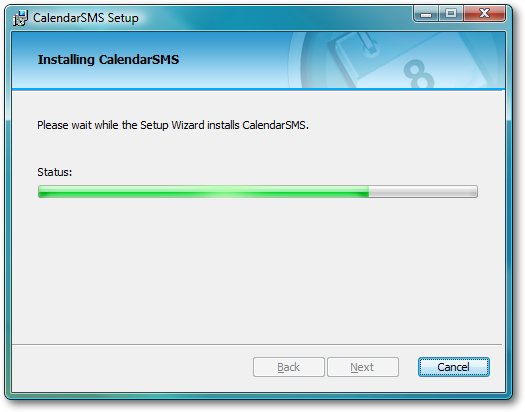
INSTALLATION STEP 5
Wait for the installation to finish.
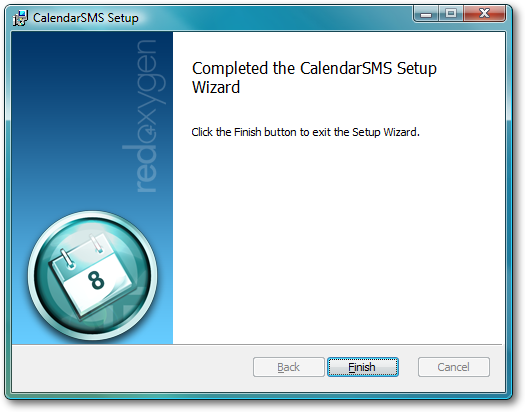
INSTALLATION STEP 6
Installation completed Click “Finish” to complete the installation of CalendarSMS.
Advanced Installation (Optional)
ADVANCED INSTALLATION STEP 1
Click the “Advanced” in the License Agreement page will prompt you to choose the destination folder.

ADVANCED INSTALLATION STEP 2
Choose the destination folder or leave the default value and then click “Next” to continue.
ADVANCED INSTALLATION STEP 3

The Product Features page will appear where you can choose to install help file only when it is needed.
ADVANCED INSTALLATION STEP 4
Click “Install” to confirm installation.
Configuring CalendarSMS
CONFIGURATION STEP 1
Click “Next” to continue.
CONFIGURATION STEP 2
CalendarSMS stores appointment information in a database file, CalendarSMS.cdb, located in your my documents folder. You can change the name and location of this file or use an existing shared database file by clicking the browse (…) button.
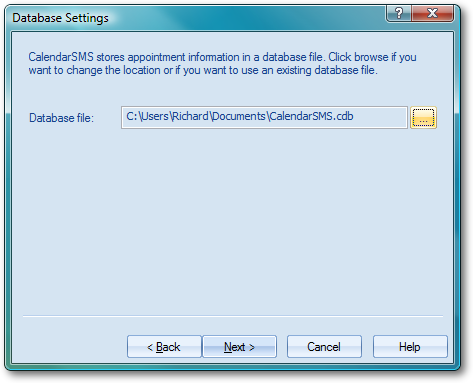
Click “Next” to continue. CalendarSMS will create the database if it doesn’t exist; otherwise, it will read the contents and use it.
CONFIGURATION STEP 3
CalendarSMS requires an internet connection in order to communicate and send requests to the Red Oxygen server. Please specify the type of internet connection you use:
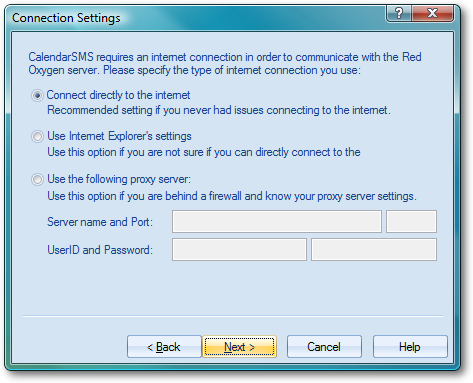
Click “Next” to continue. CalendarSMS will test the settings you have chosen and will display a window if it is successful or not.
CONFIGURATION STEP 4
When you sign up an account with Red Oxygen, you will receive an email about the details needed on this window. If you don’t know or lost your email, please contact support@redoxygen.com
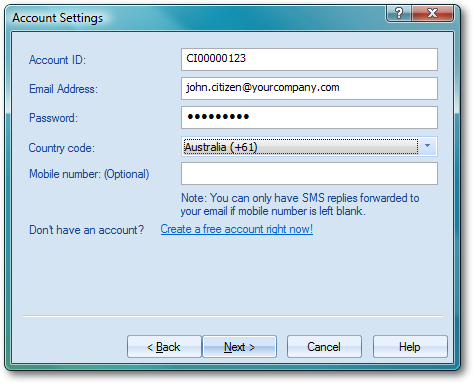
Account ID: Enter your Red Oxygen Account ID here.
Email Address: Enter the email address you used to sign-up with Red Oxygen.
Password: Enter the password you used to sign-up with Red Oxygen.
Country Code: Select the country code where your mobile number is registered.
Mobile Number: Enter your the mobile number here.
[NOTE]
If mobile number is left blank, all your replies will automatically be forwarded to the email address you used to sign-up. Reply destination can be changed from Tools→Option→Program Settings.
Click “Next” to continue. If one or more the account information is incorrect, an error message will be displayed.
CONFIGURATION STEP 5
CalendarSMS creates appointments in the context of a resource. A resource can be the names of the personal trainers working in a fitness gym, conference or meeting rooms in an office environment, etc.
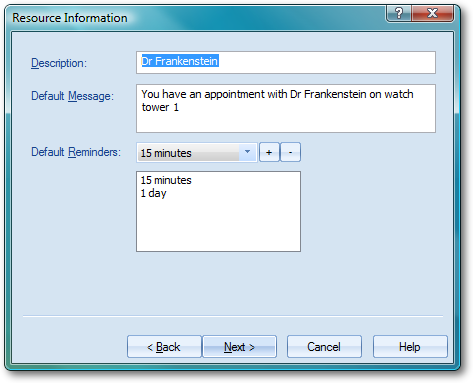
Description: Enter here a short description of the resource.
Default Message: Enter here the default message you would want your recipients to receive.
Default Reminders: Select the default reminders you want to messages to be received before the appointment or meeting time.
Click “Next” to continue.